When I was little I never liked red velvet cakes. I was always disappointed that they were not chocolatey enough (or at all). John's dad wanted Red Velvet cake for his birthday, so I looked for a good recipe. I have never gone wrong with Smitten Kitchen so I tried this recipe.
It has more chocolate than most recipes so it is much better (in my opinion) than the normal recipe. Plus, it has a volcano as the last step!
smittenkitchen.com/2007/09/red-velvet-cake/
Red Velvet Cake
Adapted from “The Confetti Cakes Cookbook” by Elisa Strauss via the New York Times 2/14/07
Yield: 3 cake layers or ~35 cupcakes
1 tablespoon unsalted butter
3 1/2 cups cake flour
1/2 cup unsweetened cocoa (not Dutch process)
1 1/2 teaspoons salt
2 cups canola oil
2 1/4 cups granulated sugar
3 large eggs
6 tablespoons (3 ounces) red food coloring or 1 teaspoon red gel food coloring dissolved in 6 tablespoons of water
1 1/2 teaspoons vanilla
1 1/4 cup buttermilk
2 teaspoons baking soda
2 1/2 teaspoons white vinegar.
1. Preheat oven to 350 degrees. Place teaspoon of butter in each of 3 round 9-inch layer cake pans and place pans in oven for a few minutes until butter melts. Remove pans from oven, brush interior bottom and sides of each with butter and line bottoms with parchment.
2. Whisk cake flour, cocoa and salt in a bowl.
3. Place oil and sugar in bowl of an electric mixer and beat at medium speed until well-blended. Beat in eggs one at a time. With machine on low, very slowly add red food coloring. (Take care: it may splash.) Add vanilla. Add flour mixture alternately with buttermilk in two batches. Scrape down bowl and beat just long enough to combine.
4. Place baking soda in a small dish, stir in vinegar and add to batter with machine running. Beat for 10 seconds.
5. Divide batter among pans, place in oven and bake until a cake tester comes out clean, 40 to 45 minutes. Let cool in pans 20 minutes. Then remove from pans, flip layers over and peel off parchment. Cool completely before frosting.
Cupcake variation: Since this has been published, many readers have written in to express that it adapts well to cupcakes. The yield is approximately 35 cupcakes, with the liners filled only 3/4 of the way, and the baking time should be between 20 to 25 minutes, but check in on them 2/3 of the way through in case your oven gets the job done faster.
Cocoa Notes
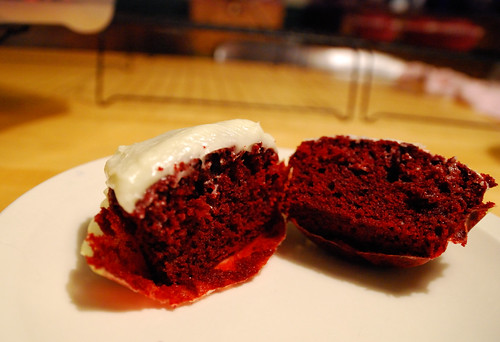
Some red velvet cakes have no cocoa, others have up to half a cup. The less cocoa, the brighter the red, and the less food dye is needed to give it the desired hue. This cake has more cocoa and quite a bit of red dye, but as you cans see from the picture, it is a real stand-out red. Feel free to use less, but make sure you dissolve it in 6 tablespoons of water to compensate for any moisture lost.
Dutch versus Non-Dutched cocoa: This recipe uses baking soda, so it calls for non-Dutch-Processed cocoa. The reason is that Dutch-Process cocoa is neutral and will not react with baking soda, so it can only be used in 1) recipes with baking powder or 2) recipes with enough other acidic ingredients that will compensate for the lack of acidity. However, you’ll notice that this recipe has both vinegar and buttermilk in it, or quite a bit of acidity, leading me to wonder if either kind of cocoa could be used with success. I had non-Dutch on hand, so I used it, but if you only have Dutch and try this recipe, let us know if it works. Personally, I prefer the Dutched stuff because it usually is of a higher quality with a more delicate chocolate flavor.
Cream Cheese Frosting
Adapted from several sources
Makes 6 cups
8 ounces cream cheese, room temperature
1/2 cup (1 stick) butter room temperature
3 cups confectioner’s sugar, sifted
1 teaspoon pure vanilla extract
Place cream cheese and butter in a medium bowl. With a handheld electric mixer, beat until light and fluffy, about 2 minutes. Add sugar and vanilla. Beat, on low speed to combine. If too soft, chill until slightly stiff, about 10 minutes, before using.
Icing Notes:
Technique: Cake decorators will always tell you to ice a cake in two batches, first a “crumb layer” and then the more decorative one. Though I rarely bother, in this cake in particular, with its dark hue barely disguised by a thin layer of frosting, it is especially helpful. To do this, place a small amount of frosting on the cake and spread it over the entire surface that will be iced, thereby anchoring wayward crumbs in place so that they will not mess up the final product. A few minutes in the freezer or longer in the fridge will firm this up so that you have an ideal surface to build the real layer of frosting upon. (I did a rushed, half-assed one, hence the visible crumbs in the final product.)
Quantity: The recipe here creates an amount of frosting that allows for a thin coat between and over the cake layers. I found it to have the ideal cake-to-frosting balance for this recipe. However, you might want to double the recipe if you prefer a more decadent, padded frosting layer.
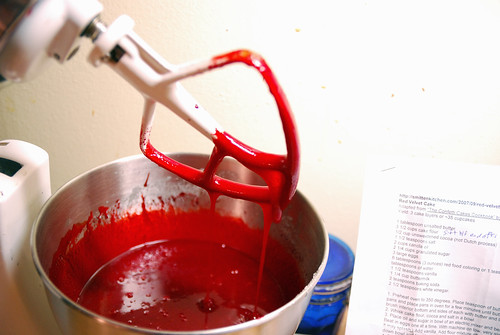
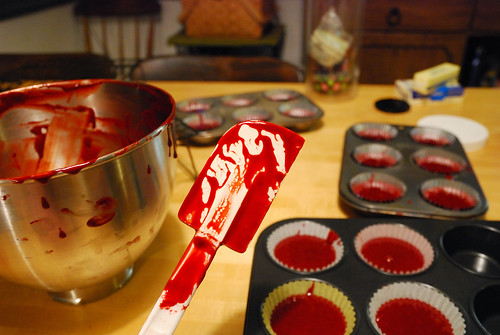
Mixing Red Velvet Cupcake, originally uploaded by queenofthemoodswingset2.
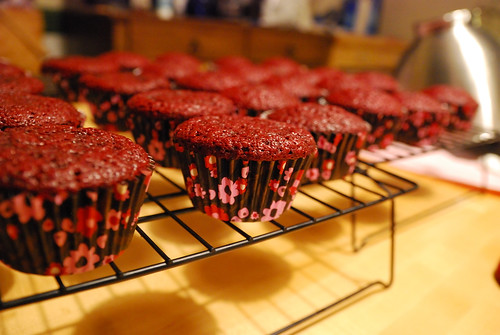
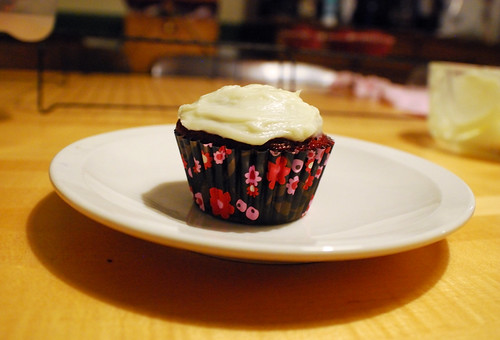
Red Velvet Cupcake , originally uploaded by queenofthemoodswingset2.
It has more chocolate than most recipes so it is much better (in my opinion) than the normal recipe. Plus, it has a volcano as the last step!
smittenkitchen.com/2007/09/red-velvet-cake/
Red Velvet Cake
Adapted from “The Confetti Cakes Cookbook” by Elisa Strauss via the New York Times 2/14/07
Yield: 3 cake layers or ~35 cupcakes
1 tablespoon unsalted butter
3 1/2 cups cake flour
1/2 cup unsweetened cocoa (not Dutch process)
1 1/2 teaspoons salt
2 cups canola oil
2 1/4 cups granulated sugar
3 large eggs
6 tablespoons (3 ounces) red food coloring or 1 teaspoon red gel food coloring dissolved in 6 tablespoons of water
1 1/2 teaspoons vanilla
1 1/4 cup buttermilk
2 teaspoons baking soda
2 1/2 teaspoons white vinegar.
1. Preheat oven to 350 degrees. Place teaspoon of butter in each of 3 round 9-inch layer cake pans and place pans in oven for a few minutes until butter melts. Remove pans from oven, brush interior bottom and sides of each with butter and line bottoms with parchment.
2. Whisk cake flour, cocoa and salt in a bowl.
3. Place oil and sugar in bowl of an electric mixer and beat at medium speed until well-blended. Beat in eggs one at a time. With machine on low, very slowly add red food coloring. (Take care: it may splash.) Add vanilla. Add flour mixture alternately with buttermilk in two batches. Scrape down bowl and beat just long enough to combine.
4. Place baking soda in a small dish, stir in vinegar and add to batter with machine running. Beat for 10 seconds.
5. Divide batter among pans, place in oven and bake until a cake tester comes out clean, 40 to 45 minutes. Let cool in pans 20 minutes. Then remove from pans, flip layers over and peel off parchment. Cool completely before frosting.
Cupcake variation: Since this has been published, many readers have written in to express that it adapts well to cupcakes. The yield is approximately 35 cupcakes, with the liners filled only 3/4 of the way, and the baking time should be between 20 to 25 minutes, but check in on them 2/3 of the way through in case your oven gets the job done faster.
Cocoa Notes
Some red velvet cakes have no cocoa, others have up to half a cup. The less cocoa, the brighter the red, and the less food dye is needed to give it the desired hue. This cake has more cocoa and quite a bit of red dye, but as you cans see from the picture, it is a real stand-out red. Feel free to use less, but make sure you dissolve it in 6 tablespoons of water to compensate for any moisture lost.
Dutch versus Non-Dutched cocoa: This recipe uses baking soda, so it calls for non-Dutch-Processed cocoa. The reason is that Dutch-Process cocoa is neutral and will not react with baking soda, so it can only be used in 1) recipes with baking powder or 2) recipes with enough other acidic ingredients that will compensate for the lack of acidity. However, you’ll notice that this recipe has both vinegar and buttermilk in it, or quite a bit of acidity, leading me to wonder if either kind of cocoa could be used with success. I had non-Dutch on hand, so I used it, but if you only have Dutch and try this recipe, let us know if it works. Personally, I prefer the Dutched stuff because it usually is of a higher quality with a more delicate chocolate flavor.
Cream Cheese Frosting
Adapted from several sources
Makes 6 cups
8 ounces cream cheese, room temperature
1/2 cup (1 stick) butter room temperature
3 cups confectioner’s sugar, sifted
1 teaspoon pure vanilla extract
Place cream cheese and butter in a medium bowl. With a handheld electric mixer, beat until light and fluffy, about 2 minutes. Add sugar and vanilla. Beat, on low speed to combine. If too soft, chill until slightly stiff, about 10 minutes, before using.
Icing Notes:
Technique: Cake decorators will always tell you to ice a cake in two batches, first a “crumb layer” and then the more decorative one. Though I rarely bother, in this cake in particular, with its dark hue barely disguised by a thin layer of frosting, it is especially helpful. To do this, place a small amount of frosting on the cake and spread it over the entire surface that will be iced, thereby anchoring wayward crumbs in place so that they will not mess up the final product. A few minutes in the freezer or longer in the fridge will firm this up so that you have an ideal surface to build the real layer of frosting upon. (I did a rushed, half-assed one, hence the visible crumbs in the final product.)
Quantity: The recipe here creates an amount of frosting that allows for a thin coat between and over the cake layers. I found it to have the ideal cake-to-frosting balance for this recipe. However, you might want to double the recipe if you prefer a more decadent, padded frosting layer.

Mixing Red Velvet Cupcake, originally uploaded by queenofthemoodswingset2.

Red Velvet Cupcake , originally uploaded by queenofthemoodswingset2.
